Intro
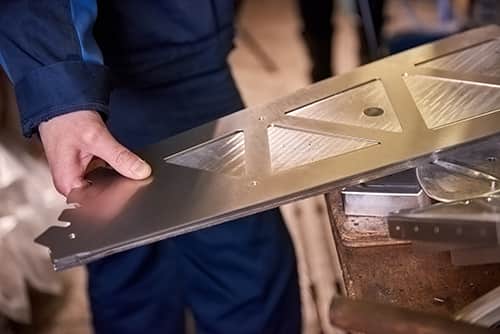
Creating a cutout near a bend on a piece of sheet metal is a big red flag for a design. If a machinist follows the print, you’ll likely receive a part that doesn’t have the rigidity you need in this area. The part can be cracked, but it definitely won’t have the same structural strength as the rest of the part.
To avoid this, you need to understand how to design cutouts near a bent piece. In the following sections, we’ll teach you everything you need to know. We’ll even give you some pro designer tips.
Defining Bent Pieces
Before getting started, we should define what we’re talking about. In this case, we’re referring to geometries that get cut out of sheet metal near the location of a bent angle.
Imagine a U-shaped piece of bent metal. This piece includes two bends that give it the “U” shape. As long as there’s enough material and space, there’s nothing wrong with making a bent piece like this. The issue occurs when there are additional cutouts near the bends.
The bends are made by a powerful head pressing the metal into a die. Before the bend, the piece will be flat and get cut out.

Why Cutouts Near Bends Matter
If a cut-out geometry is too close to where a bend goes, you’ll run into trouble. The material is very vulnerable in this area, and the force of the head pushing the sheet metal into the die can cause chunks to rip out and create stress fractures in this area.
This only happens when there’s not enough material between the cutout and the start of the bend. It’s the same reason why drilled holes need to be a certain distance away from the corner of fabricated parts.
The Rule of Thumb
To avoid disaster, there’s a simple rule of thumb within the sheet metal fabrication world: cutouts should be at a distance at least as large as the minimum bend radius of the part.
For instance, 14-gauge stainless steel commonly comes with a minimum bend radius of 0.275”. This means that any cutouts need to be at least 0.275” away from the bend.
To keep things simple, look at the orthogonal view of the part (look at the face that has the cutout on it) and measure from the end of the cutout to the face of the bend. If there’s a cutout on the side of a bent piece near the bend to the top of the part, then you’re measuring from the top portion of the cutout to the top face.
Regardless of your material and gauge of sheet metal, this rule of thumb will work.
There are Exceptions to the Rule
With a lot of great rules of thumb, there are exceptions to this rule. For certain designs, there is simply no way to avoid putting a cutout near a bend. Rather than just not making the part, you can use one of the following tips.
How to Design Cutouts Near a Bent Piece
As promised, here are some ways to successfully design cutouts near a bent piece. These methods will prevent the cracking, fracturing, and failing that would otherwise occur in your situation.
Utilize Notches
From a machinist’s perspective, notches are one of the best ways to design a cutout near the bend. A notch is a designed hole or an additional cutout. The purpose of a notch is to disrupt the nearby bend in order to avoid issues associated with cutouts near a bend.
There are different styles of notches, but the simplest version is this: before being bent, the machinist will cut a relief notch near the designed cutout. After getting bent, this relief notch is not bent at all. Instead, it’s a straight platform that interrupts the otherwise continuous bend.
From a physics perspective, the designed cutout doesn’t even know there’s a bend nearby. You won’t need to worry about cracking, failure, or a physically compromised part near the cutout.
As an alternative, the part can be cut along the desired bend seam before getting bent. In this case, the notch will resemble a missing piece of the bend in this section rather than an overhanging flange we described in the previous paragraph.
Either of these notch options are viable. The key takeaway is that a designed notch is cut before the piece gets bent.
Consider Sectioning the Bend
A sectioned bend will be missing a chunk of material near the cutout section. To visualize this, imagine a bent piece with a nearby cutout. Instead of there being a flange near the cutout, there is an absence of material. In this case, the bend isn’t continuous and features a gap near any cutouts.
The same ideas are present here just like in a designed notch. Since there’s no bend nearby, the cutout won’t see the same physical stresses. The difference between a sectioned bend and a notch is how much of the bend is interrupted.
A notch might just cut a small piece of a bend out while a sectioned bend is missing a whole flange in a certain area.
Design an Assembly (Instead of One Part)
You might also be able to design around the required bend. Instead of having a single piece get cutout then bent, you can create a two- (or multi-) piece assembly. These assemblies can get fastened or adhered together.
One piece will feature the cutout while the other has an overlapping bend. Since the cutout isn’t on the same piece as the bend, you won’t need to worry about the failure mode associated with having the two features near each other.
This option is a little more difficult, and sometimes impossible. It depends on your application.
Conclusion
Hopefully, one of these alternatives will help you avoid designing a cutout near a bent piece and experiencing a failure in that area. If you want more design tips, explore the rest of our blog. If you want to get great fabricated results, then you can reach out to our pros at Rapid Axis for a free quote today.